Since I released the BlueFlyVario_TTL a few weeks ago many people have purchased one to integrate with the Kobo for use with XCSoar. The purpose of this post is to provide a few tips. It is by no means a complete tutorial for beginners. Integration with the Kobo requires careful soldering and software manipulation shills.
Step 1 - Get your Kobo
The Kobo mini is currently being sold for around $50. I understand they are no longer being produced and most stockists are getting rid of them at cost. Other devices such as the Kobo Touch can be used in a similar manner. At some stage these devices will be hard to find.
Step 2 - Make sure it works as a standard eReader
After purchasing the Kobo you should configure it like a normal eReader as per the instructions that came with it. This is important to do prior to installing XCSoar.
Step 3 - Back up the SD Card
The device has an SD card inside which includes the operating system and applications. Open up the Kobo and put the SD card into a reader. Create an image of it with win32DiskImager or your favourite sd card imaging software. Save the backup image somewhere where you will not loose it. Make sure to turn off the kobo prior to the next step.
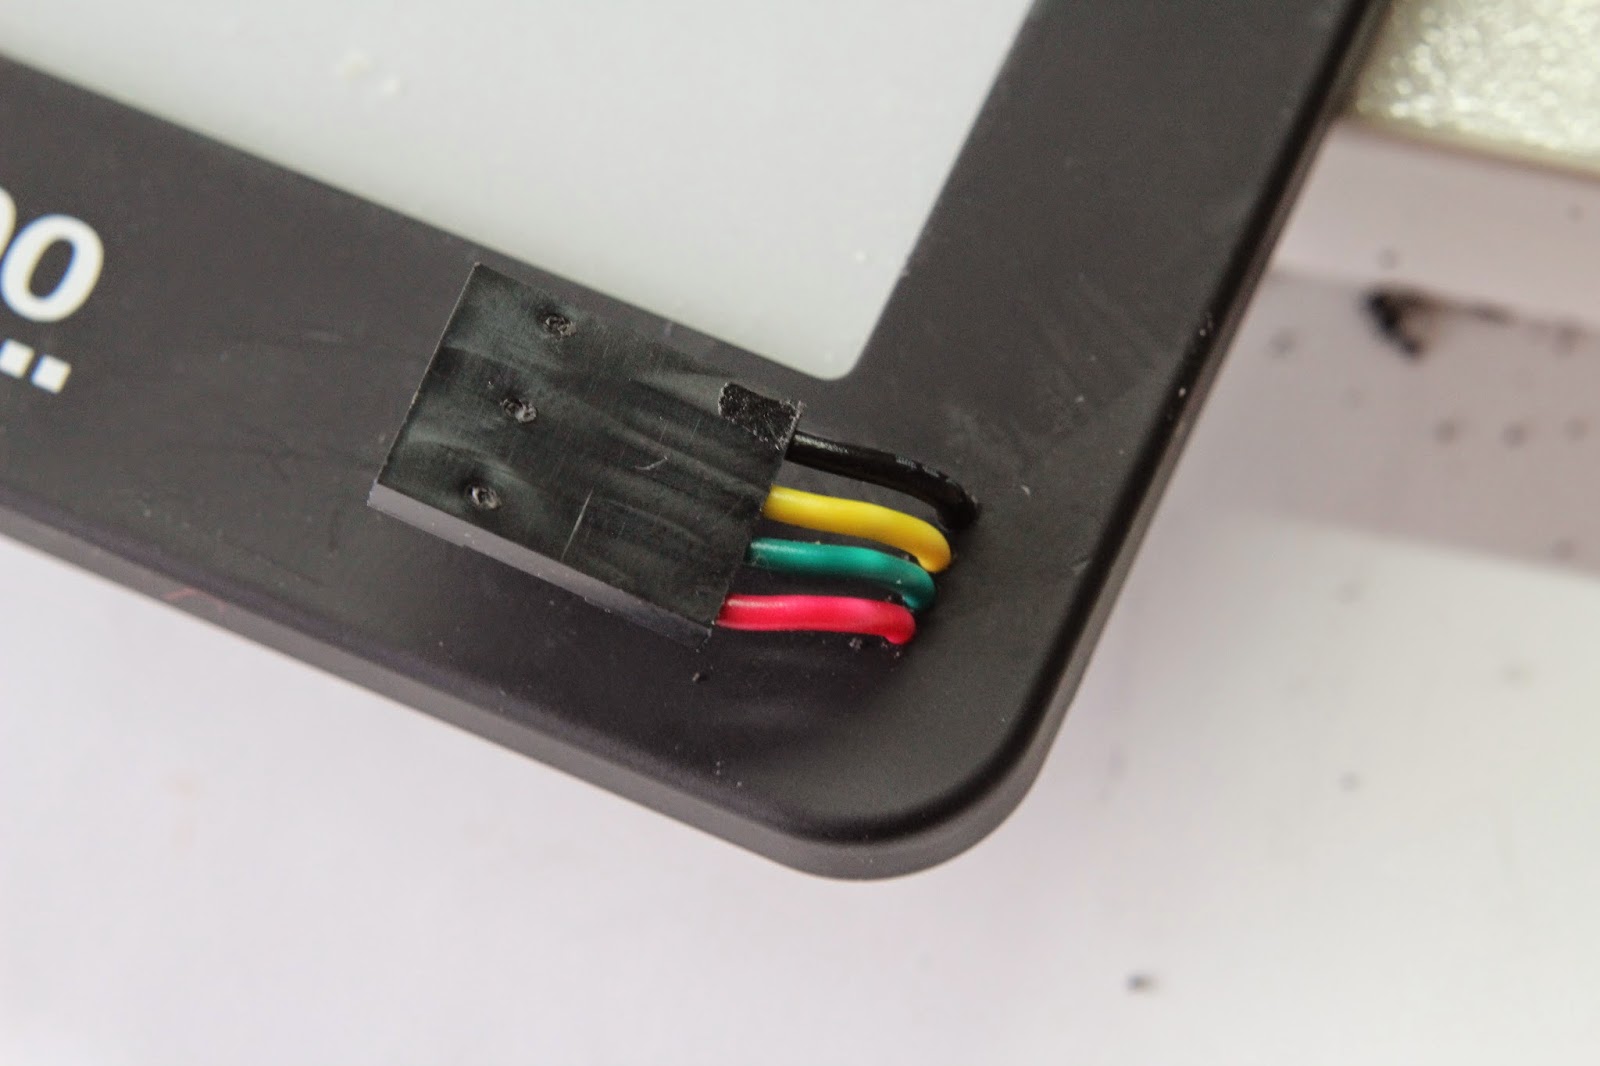
Step 4 - Solder wires to the internal serial port
Take off the back covers and identify the serial port in the bottom left of the circuit board. The images below shows a good location for the wires and holes if you want your BlueFlyVario_TTL mounted on the front of the device. I have used a 4 port 2.54mm pitch dupont housing to plug the BlueFlyVario_TTL into. I drilled the holes from the rear and matched each size hole with the diameter of the wires. Note that the Rx from the Kobo needs to match to the Tx from the BlueFlyVario_TTL, and the Tx from the Kobo needs to match to the Rx from the BlueFlyVario TTL.

The holes were drilled from the rear. The solder residue on the serial port is from a previous installation.

The holes look pretty small from the front.
Push the wires through from the front prior to soldering.

Soldering the wires is a little tricky. I started with a dab of solder on each solder hole, tinned the trimmed wire with solder, then angled each one into the hole after reheating it with the iron. Note that the ground is much more difficult to solder as the heat is rapidly drawn away by the larger copper pour on the Kobo PCB.
Step 5 - Install XCSoar
The Kobo XCSoar image and instructions can be found here: http://www.xcsoar.org/download/. I will not cover how to do this in great detail; there is heaps of information on the XCSoar forums and other internet resources to help you out.
Step 6 - Test the BlueFlyVario_TTL is working
After you have XCSoar working, and the Kobo is on, plug in the TTL to the front of the device. You should here it's startup beep. Next:

Step 8 - Configure the BlueFlyVario_TTL Hardware Settings
This bit was pretty tricky to work out. Thanks to Steve Nagle for his help. In fact, it was pretty much all worked out by him.
The aim is to alter the BlueFlyVario hardware settings directly from the Kobo (linux) command line without having to plug the vario into a windows PC. This is how you do it:
Now communicate with the BlueFly over the serial port using commands as follows:
$GPGGA,025704.101,,,,,0,0,,,M,,M,,*4C
PRS 18681
PRS 18680
$GPGSA,A,1,,,,,,,,,,,,,,,*1E
PRS 18680
PRS 18681
PRS 18680
Now press ctrl C to stop that.
Step 1 - Get your Kobo
The Kobo mini is currently being sold for around $50. I understand they are no longer being produced and most stockists are getting rid of them at cost. Other devices such as the Kobo Touch can be used in a similar manner. At some stage these devices will be hard to find.
Step 2 - Make sure it works as a standard eReader
After purchasing the Kobo you should configure it like a normal eReader as per the instructions that came with it. This is important to do prior to installing XCSoar.
Step 3 - Back up the SD Card
The device has an SD card inside which includes the operating system and applications. Open up the Kobo and put the SD card into a reader. Create an image of it with win32DiskImager or your favourite sd card imaging software. Save the backup image somewhere where you will not loose it. Make sure to turn off the kobo prior to the next step.
Step 4 - Solder wires to the internal serial port
Take off the back covers and identify the serial port in the bottom left of the circuit board. The images below shows a good location for the wires and holes if you want your BlueFlyVario_TTL mounted on the front of the device. I have used a 4 port 2.54mm pitch dupont housing to plug the BlueFlyVario_TTL into. I drilled the holes from the rear and matched each size hole with the diameter of the wires. Note that the Rx from the Kobo needs to match to the Tx from the BlueFlyVario_TTL, and the Tx from the Kobo needs to match to the Rx from the BlueFlyVario TTL.
The holes were drilled from the rear. The solder residue on the serial port is from a previous installation.
The holes look pretty small from the front.
Push the wires through from the front prior to soldering.
Soldering the wires is a little tricky. I started with a dab of solder on each solder hole, tinned the trimmed wire with solder, then angled each one into the hole after reheating it with the iron. Note that the ground is much more difficult to solder as the heat is rapidly drawn away by the larger copper pour on the Kobo PCB.
Step 5 - Install XCSoar
The Kobo XCSoar image and instructions can be found here: http://www.xcsoar.org/download/. I will not cover how to do this in great detail; there is heaps of information on the XCSoar forums and other internet resources to help you out.
Step 6 - Test the BlueFlyVario_TTL is working
After you have XCSoar working, and the Kobo is on, plug in the TTL to the front of the device. You should here it's startup beep. Next:
- Double tap on the screen to bring up the Menu.
- Go Config|Config 1/3|Devices
- Ensure device A is selected and tap Edit
- Change the following settings:
- Port: ttymxc0
- Baud rate: 57600
- Driver: BlueFly Vario
- Ignore checksum: On
- Click ok, then Monitor to see the incoming data stream.
Step 7 - Attach a GPS to the BlueFlyVario_TTL U1 port
Incoming GPS data (NMEA sentences) will be streamed via U1 on the BlueFlyVario_TTL and multiplexed with the BlueFlyVario output stream. XCSoar can read the combined stream from the single port. The image below shows a cheap NEO-6M module connected directly to the BlueFlyVario_TTL. The BlueFlyVario expects a 96008N1 serial input from the GPS. Read the section of the BlueFlyVario Hardware Settings Manual for more information about the second serial port.
Step 8 - Configure the BlueFlyVario_TTL Hardware Settings
This bit was pretty tricky to work out. Thanks to Steve Nagle for his help. In fact, it was pretty much all worked out by him.
The aim is to alter the BlueFlyVario hardware settings directly from the Kobo (linux) command line without having to plug the vario into a windows PC. This is how you do it:
- Restart the Kobo with XCSoar on it.
- Press "Network" at bottom of screen.
- At top of screen press the button where it says "Wifi ON" (this turns the Wifi on - button then confusingly shows text "Wifi OFF" meaning that pressing it again will have that effect)
- Press the button "Wifi" to select a Wifi network, connect to your network (The Kobo will display 'connected' next to network name on Wifi page).
- Once connected press Close button on the wifi page
- Use a pc and browser to log into your router to find out what network ip address it has allocated to your Kobo (my router is accessed by typing 192.168.1.1 into the browser address box - Google your router brand to find out what it's default internal ip address (and username / password is)
- On the Kobo press the "Telnet server" button to start telnet on kobo
- On your PC Telnet to the ip address you found with root as username, no password. In linux use the telnet command at the command prompt, or in windows download a program called Putty and use that.
- You should now have a command prompt on your PC. Your PC is now the screen and keyboard for your Kobo, which runs linux. (Type ls and hit return - you should get a directory listing).
Now communicate with the BlueFly over the serial port using commands as follows:
- stty ospeed 57600 ispeed 57600 -F /dev/ttymxc0 'changes baud settings to match BlueFlyVario.
- stty -F /dev/ttymxc0 raw 'makes sure the terminal program in linux sends off characters as they arrive.
- cat /dev/ttymxc0 'test to display the output from BlueFlyVario
$GPGGA,025704.101,,,,,0,0,,,M,,M,,*4C
PRS 18681
PRS 18680
$GPGSA,A,1,,,,,,,,,,,,,,,*1E
PRS 18680
PRS 18681
PRS 18680
Now press ctrl C to stop that.
Now we will adjust some settings. These are just examples. See Annex A to the the Hardware Settings Manual for a detailed technical description of the settings.
Type the following:
- echo '$BVL 50*'>/dev/ttymxc0 'Sets the volume on the BlueFlyVario to 50.
- echo '$BOF 10*'>/dev/ttymxc0 'This command changes the output rate to five sentences a second (from the normal 50 (i.e. 50/10)). I think this lessens the CPU workload on the Kobo to handle so many characters over the UART.
- echo '$BOM 2*'>/dev/ttymxc0 'This command changes the output format to the LX protocol. Again this lessens the workload on the Kobo as vario value (rather than raw pressure value) is read from the incoming stream. You need to also change the XCSoar driver from 'BlueFly Vario' to 'LX / Colibri' if you change this setting.
- cat /dev/ttymxc0 'Again to test the display.
Now press ctrl C to stop that. Type exit to quit. Turn Wifi off and reboot the Kobo.
More Pictures
Below are some more pictures from Steve's install.


Next Steps
Installing the BlueFlyVario_TTL on the Kobo with XCSoar has proven pretty popular. I am working on another version of the BlueFlyVario_TTL which includes a GPS onboard so there is no need to do that step. I am thinking the PA6H will be a good fit. The board could end up looking like this:

Note the switch so you can continue to use it as a eReader without draining power. Before I get this working I need to add a new setting in the firmware which allows configuration of the GPS when it is attached. More work to do...
Next Steps
Installing the BlueFlyVario_TTL on the Kobo with XCSoar has proven pretty popular. I am working on another version of the BlueFlyVario_TTL which includes a GPS onboard so there is no need to do that step. I am thinking the PA6H will be a good fit. The board could end up looking like this:
Note the switch so you can continue to use it as a eReader without draining power. Before I get this working I need to add a new setting in the firmware which allows configuration of the GPS when it is attached. More work to do...